Microsoft Entra SSO
Configure Microsoft Entra SSO
Follow these steps to enable Microsoft Entra SSO.
Sign in to the Microsoft Entra admin center as at least a Cloud Application Administrator.
Browse to Identity > Applications > Enterprise applications > Site name > Single sign-on.
On the Select a single sign-on method page, select SAML.
On the Set up single sign-on with SAML page, click the pencil icon for Basic SAML Configuration to edit the settings.
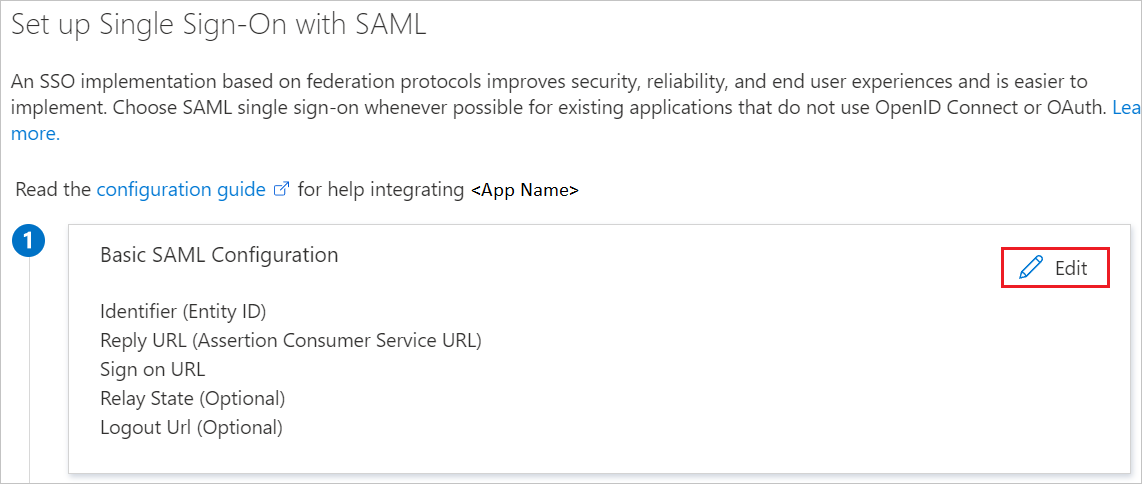
On the Basic SAML Configuration section, if you wish to configure the application in IDP initiated mode, perform the following step:
In the Identifier text box, type the URL:
https://app.site.com/api/v1/account/metadata/Click Set additional URLs and perform the following step if you wish to configure the application in SP initiated mode:
In the Sign-on URL text box, type the URL:
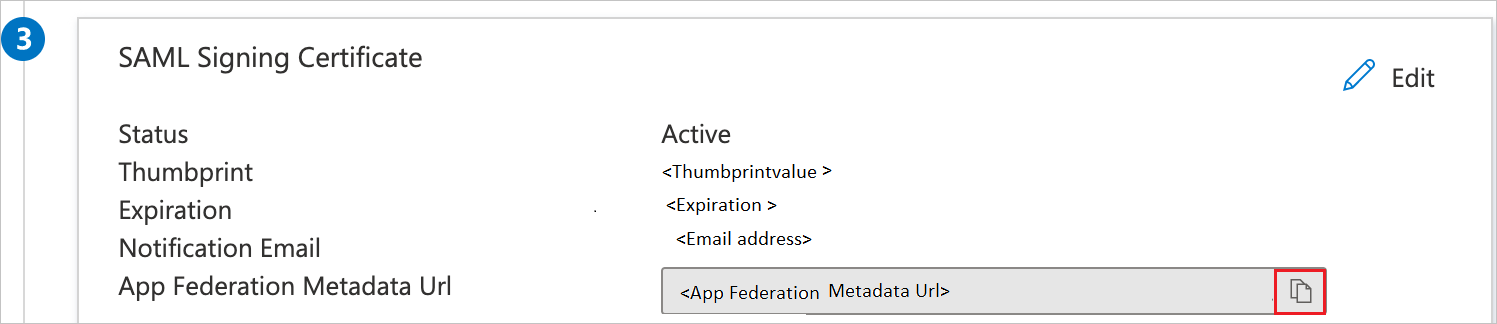
https://app-infotv.net/loginOn the Set up Single Sign-On with SAML page, In the SAML Signing Certificate section, click copy button to copy App Federation Metadata Url and save it on your computer.
Create a Microsoft Entra test user
In this section, you'll create a test user called B.Simon.
- Sign in to the Microsoft Entra admin center as at least a User Administrator.
- Browse to Identity > Users > All users.
- Select New user > Create new user, at the top of the screen.
- In the User properties, follow these steps:
- In the Display name field, enter
B.Simon. - In the User principal name field, enter the username@companydomain.extension. For example,
B.Simon@contoso.com. - Select the Show password check box, and then write down the value that's displayed in the Password box.
- Select Review + create.
- In the Display name field, enter
- Select Create.
Assign the Microsoft Entra test user
In this section, you'll enable B.Simon to use single sign-on by granting access to Yodeck.
- Sign in to the Microsoft Entra admin center as at least a Cloud Application Administrator.
- Browse to Identity > Applications > Enterprise applications > Site name.
- In the app's overview page, select Users and groups.
- Select Add user/group, then select Users and groups in the Add Assignment dialog.
- In the Users and groups dialog, select B.Simon from the Users list, then click the Select button at the bottom of the screen.
- If you are expecting a role to be assigned to the users, you can select it from the Select a role dropdown. If no role has been set up for this app, you see "Default Access" role selected.
- In the Add Assignment dialog, click the Assign button.
Related Articles
Opsætning af Microsoft SSO brugere
Log ind på https://booking.app-infotv.net, navigér til brugere, og tryk "Giv admin samtykke Vælg en konto der har rettigheder til at give samtykke Giv samtykke Du kan nu konfigurere samtykke Her kan du så se hvilket tentant ID i Microsoft vi har ...Single Sign-on (SAML 2.0)
Single Sign-on (SAML 2.0) Last updated on April 24th, 2024 Intro The Security Assertion Markup Language (SAML) is an XML-based standard to exchange authentication and authorization information. SAML was developed by the security services technical ...Power Bi
Power Bi Introduction Power BI is a business analytics service by Microsoft. It aims to provide interactive visualizations and business intelligence capabilities with an interface simple enough for end-users to create reports and dashboards. It is ...Setting Up Outlook Calendar Synchronization in Euroscreen
Setting Up Outlook Calendars This is a guide on how to synchronize bookings from your Outlook calendar to our booking system, so the bookings can be displayed on your meeting room and info screens. Setting Up the Integration Log in to Euroscreen ...Opsættelse af AD synkronisering
Opsættelse af AD synkronisering 1. Inden du starter Under opsætningen skal der være en administrator til rådighed for Azure Portal, hvis ikke, kan appen ikke få de godkendelser der skal gives, for at kunne oprette forbindelse med Azure Active ...